Showing posts with label Quick. Show all posts

Friday, August 5, 2011

A Ramadan Drink

During the month of Ramadan, on days that I keep fast, I look forward to specific tastes or treats which I remember from my childhood.  Not eating or drinking anything all day, one is left at sunset craving refreshing fruits or juices which will quench your thirst.  Light but flavorful eats which will satisfy your hunger and awaken those dormant taste buds.

As a kid, we used to be given a glass of "Rooh Afza" along with some dates at sunset, to open our fast with.  Rooh Afza is a bright red colored, rose flavored, sugary syrup, which can be added to milk or water or a combination of both.  Many people have different ways of making this refreshing drink, but this Ramadan, I think I found a perfectly delicious concoction!

I tend to make my Rooh Afza in milk or a combination of 3 parts milk to 1 part water.  Using this as the base, I added some "meat" to make it more nourishing.  Lol... don't get grossed out yet, its not actual meat, but sweet meats, like coconut, pistachios and almonds.  I purchased shredded sweet coconut, pistachio (fine ground) and almonds (fine ground).  Adding about a teaspoon of each to every glass of the prepared Rooh Afza.  You can also add some crushed ice, mix well and serve.  It not only quenches your thirst, its very nutritious and will help boost your energy levels after a long day of fasting.

Saturday, June 25, 2011

Gourmet Meals for One!

Recently, I've been trying new things to motivate myself to cook at home for one. Normally, by the time I get home from work, I'm completely exhausted. The last thing I want to do is cook just for me, then have to deal with a lot of left overs. Times like these, its so much easier to just order in or pick up something on the way home. But few days of that and I start to feel unwell- stomach goes completely out of whack. Not to mention, my waistline has no control these days and I'm not fitting in to any of my work clothes.

The solution was to eat healthier at home, but that doesn't solve the problem of never being able to cook enough just for one. Grocery shopping here is definitely tailored for families or couples, not for single ppl with small appetites. I've been freezing left overs a lot but now my freezer is about to explode, I can barely close the door. I was in a similar predicament the other day when I thawed out a pack of chicken breast. It was almost 2 lbs worth and I didn't really feel like having left overs for the next 3 days! Here is what I did:

Dinner on night one: Fresh pesto and tomato pasta with grilled chicken

Lunch 2 days later: Pesto chicken salad sandwich

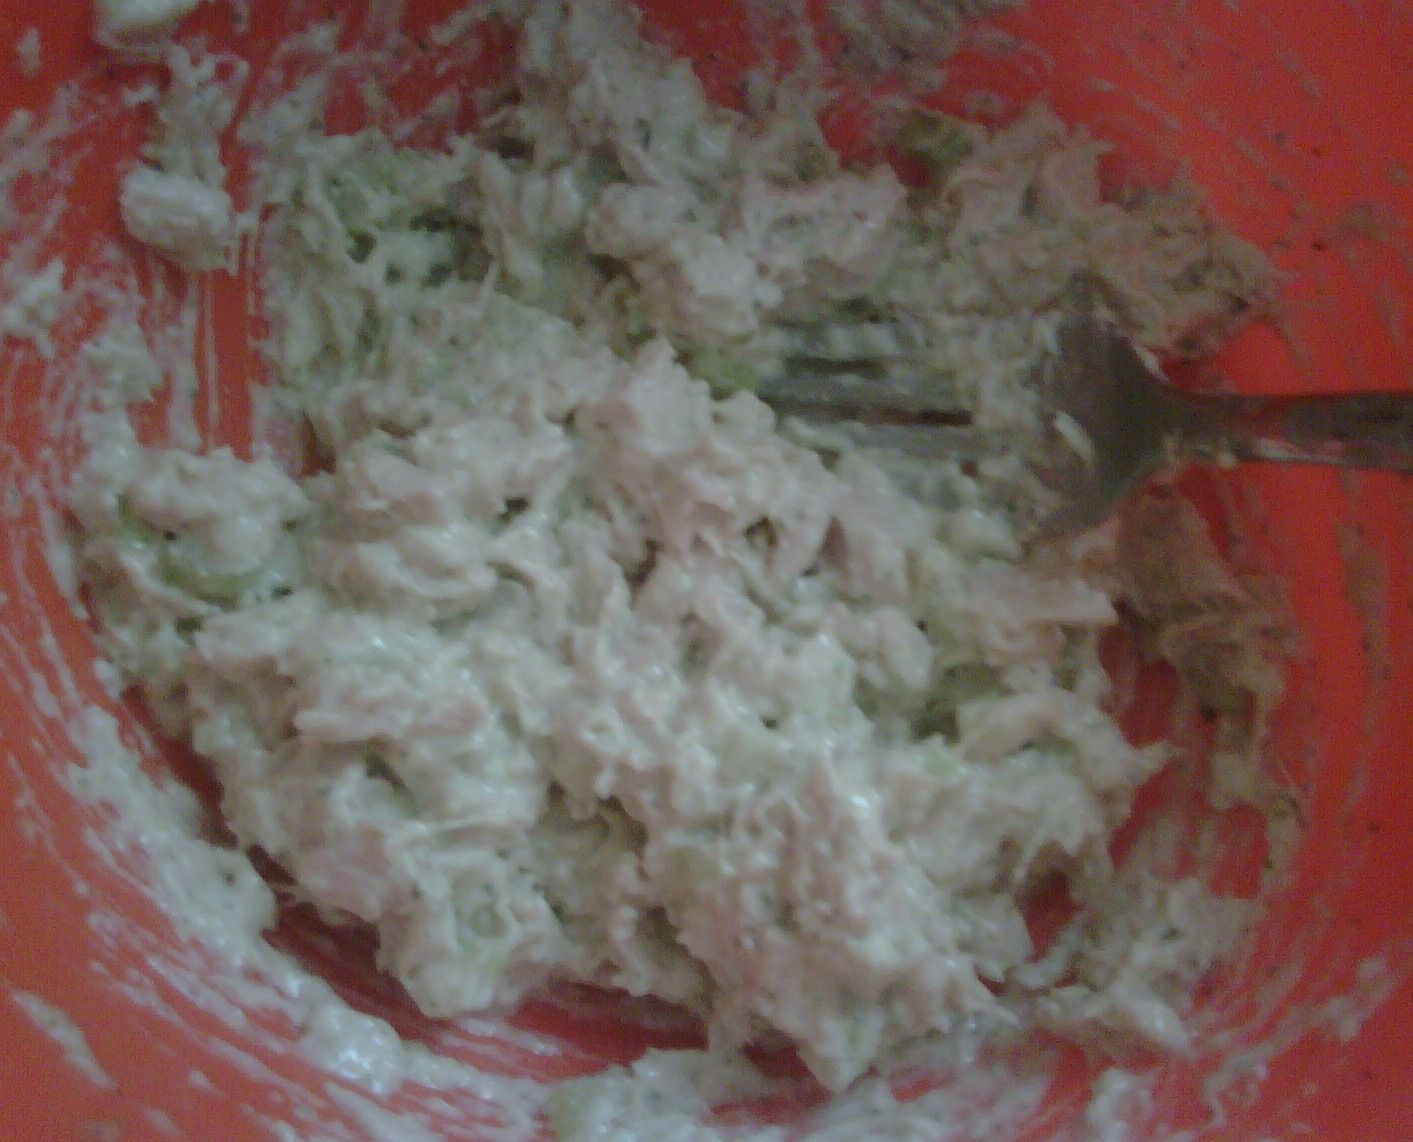
Because I also had a fresh Basil plant that really needed to be used, I made a big batch of pesto. I used the pesto with pasta the first night and then mixed it in with cream cheese and diced chicken to make a gourmet chicken salad. Because the pesto is so flavorful and had olive oil and cheese, I added a small amount of cream cheese and even smaller amount of mayo. This was not only a more flavorful chicken salad, it was healthier without all the mayo I normally use.

For the pasta:

I boiled enough spaghetti for dinner and a small lunch portion. I steamed the chicken without anything except a pinch of salt (2 medium breast pieces) and diced them in 1 inch cubes. I chopped up some tomato and then tossed everything together with the pesto. It was fresh, light and quick.

For the chicken salad:

I steamed the remaining chicken breast (3 medium and 1 small breast pieces) with just a little bit of olive oil, salt and garlic. Once cooked through, I stored it in the fridge- in an airtight container with all of the remaining juices from the pan. Two days later, I diced it up added some pesto, cream cheese, celery, tiny bit of salt and a tiny bit of mayo. The chicken salad is definitely more than one portion, but this can be had as a sandwich one time and then over a bed of lettuce and cucumbers as a refreshing salad the next day. It can also be stored in the fridge for a couple days or in the freezer for up to a month.

Hope this was helpful for you single people out there. We don't always have to resort to hot dogs or Ramen Noodles when we cook for one! There are healthier and easy options, it just takes a bit of thinking and planning.

Happy eating everyone!

Friday, April 22, 2011

Paula Deen inspired dinner

A few days ago I was at the grocery store and they had these “minute steaks” that looked really fresh. They were also a perfect size to make a meal for one and priced reasonably too. It was a Tuesday evening and I decided I would make them over the weekend, so kept them in the fridge. All day Thursday, I kept thinking about the steaks and what I could do with them. By the time I got home from work, my mouth was watering and I couldn’t wait any longer.

I decided to keep it simple, since grilled or seared meat with just a little salt tastes so flavorful, I didn’t want to take away from that. I put on some potatoes to boil (for mash) and sliced up mushrooms to sauté. Now, why did I title this a Paula Deen inspired dinner? Butter! I decided to go all out and used over ½ a cup of butter for this meal! The mushrooms were sautéed in butter with a tiny bit of Worcestershire sauce. The mash had a generous amount of butter and finally, the steaks were also cooked in butter!

What you’ll need for the steak:
Fresh Garlic (2 to 3 large cloves)
Soy Sauce
Butter

In a wide/shallow bowl, crush or mince the garlic. Add enough soy sauce to be able to dip your steak(s). Mix well and keep aside. Rinse the steak(s) just to add some moisture. Using a fork, poke the steak on both sides and then place in the soy sauce mix. Let the meat soak for a minute or two on each side. In a skillet, melt a generous amount of butter. Cook the steak(s) on medium to medium high heat, for 2 to 3 minutes on each side. This will give you a medium to medium well steak (no red and a small pink center). Of course this depends also on the thickness and size of your steak(s). Mine were about a ½ to ¾ inch thick and not very large…probably the size of a hamburger bun or smaller.
Once your steak(s) are done, you can use the skillet to make a quick pepper or garlic sauce, but I didn’t since I used salted butter and with the soy left in my pan, it was too salty.

No joke, it was probably one of the quickest and most enjoyable meals I’ve made or eaten in a long time... So, as Paula would say: See y'all next time, love and best dishes from my kitchen to yours!

Thursday, May 27, 2010

Quick Tip- stain fix

As a continuation to the Tips and Tricks series, here is another quick tip that could come in handy. Though it uses food, its not for food...

Last month we were in the process of packing up to move in to a temporary place and decided to down size. I had these bar stools from another apartment and they never fit the counter in the apartment we were in. We ended up keeping the stools on our balcony, where (not realizing) they were exposed to the elements... snow, rain, winds, dirt, etc.

I cleaned off the seat portion but didn't realize that the stainless steel bases were all stained with rust or something. I posted the stools on craigslist and someone wanted to buy them. When we pulled them in from the balcony to hand over, I noticed the stains. The buyer was only 15minutes away and we had to do something. Farhan went online and found a tip to clean rust stains. Believe it or not, by the time the buyer arrived, these stools looked BRAND NEW!!!

Here is what you need: Take a sponge and soak it with cola (coke, dr. pepper, etc) and wipe the stained metal. Take a piece of foil and gently scrub the stain. Wipe the area with water. Thats it! Simple and easy :)

Wednesday, March 17, 2010

Sweet Corn and Shrimp Enchilada's

Last night I was stuck in a meeting that ran much longer than I had planned, so by the time I got home to make dinner, it was already 9:30pm. I had some white rice left over from the night before and had planned to make some black beans with it tonight. Black beans (from a can) take hardly 10 min to make so that was one item taken care of. I just needed something quick and easy to go with this...

These enchiladas were a total experiment but turned out really good! Of course, as bad as I am with taking pictures, I remembered only AFTER I ate that I should've taken a couple. Sorry folks, next time... I see this quickly becoming a favorite  :)

6 corn tortillas (6")
1 small can of sweet yellow corn
10 to 12 medium size raw shrimp, tail off, peeled, de-viened and cut in half
1/2 cup grated Parmesan Cheese
1/2 medium yellow onion diced
1 tsp crushed garlic
1/2 tsp ground cumin
1/2 tsp cayenne (or to taste)
2 tbsp tomato sauce
1/2 cup of chicken stock or water
salt to taste
1 cup+ grated cheese (cheddar, colby, montery jack, whatever you like)
3/4 cup Old El Paso medium (red) enchilada sauce

In a skillet, saute the onion until translucent. Keeping the heat at medium to medium low, add in the cumin, cayenne, garlic and salt then mix well. Add in corn, stir and cover for a minute. Add in the tomato sauce, shrimp, chicken stock/water and stir to mix well. Cover and let cook for 5 to 7 minutes (over cooking will make the shrimp rubbery). Turn off the heat and pour contents of skillet in to a heat proof bowl, let sit for 5 min to cool down. Mix in the Parmesan cheese and check salt taste, add more if necessary. Keep to the side.

In another skillet, warm the tortillas one at a time with a drop of olive oil. Remove tortilla from skillet to a flat surface, fill with the prepared shrimp mix, roll and place seam side down in a baking/casserole dish. Repeat until all six are completed. Pour the enchilada sauce over the prepared enchiladas, sprinkle with cheese and bake for 15 to 20 minutes in the oven, set at 400 degrees. Once the cheese is melted and slightly browning around the edges, remove from oven and let sit for a few minutes before serving.

You can also add some chopped cilantro, diced tomato and sour cream as garnish if you like. I served these enchiladas with black beans, cilantro lime rice (re-purposed from the night before) and an avocado tomato salad. As always, feel free to try your own variations...point is to make things quick and easy from what is available in your freezer or pantry.

Happy Cooking!

Tuesday, February 2, 2010

Tips & Tricks

I think at some point I was going to do a series of "quick tips" but didn't really get around to it. In between longer posts, recipes and articles, I will be adding in some Tips and Tricks you may find useful in the kitchen... or otherwise.

My first tip/trick is a HUGE time and energy saver! If you go back to my recipe for Masoor Ki Daal, you'll remember I said to mash the cooked daal until it forms a paste... well if you happen to have a hand blender/kitchen stick (here is what I have) USE IT. No more spending your time or effort (mashing can be pretty tiring) hand pureeing your lentils!

Wednesday, January 27, 2010

Almond Biscotti

Unlike most people these days, I have a habit of always eating "breakfast" with my coffee. This can be anything from cereal, oatmeal, eggs, donuts, pastries, etc. Pretty much anything so that the coffee doesn't go down on an empty stomach. With age, I've become more and more lactose intolerant leading me to avoid cereal on a regular basis. Also, since I've been home (unemployed) for the past 2 years or so, I've not been getting breakfast sandwiches, pasties, donuts, the unhealthy stuff one might normally grab at a deli or on the way to work.

Long story short, I noticed for the past few months that I was having oatmeal raisin granola bars. Now this may sound ok...healthy even, but not so much. Its actually quite a bit of sugar, preservatives and other things along with all the good stuff. So I recently decided to make a batch of almond biscotti to see how it might fit in. Its actually very simple to make, very few ingredients used and no preservative or artificial ingredients. I found this recipe online and made a few changes. The recipe I found also said that it would yield 42 biscotti... I was able to make about 30.

1/2 cup butter
1 cup sugar (I use raw sugar/unrefined)
3 eggs
1 tsp almond extract and 1/2 tsp vanilla extract
2 cups flour
2 tsp baking POWDER
pinch of salt
1/2 cup fine chopped or chunky ground almonds
~2 tsp milk

Preheat your oven to 375F. Combine the flour, baking powder and salt in a bowl. In a different bowl cream the butter and sugar until light in color. Add the eggs one at a time and mixing well. Add the extracts while stirring the mix and then quickly combine the dry ingredients. Once mixed well, add in the almonds and mix again. Separate the mix into two parts. On a large baking sheet covered with parchment paper, lightly greased...spread 1/2 the batter out into a loaf type shape about 12 inches long and 3 inches wide. Repeat with the other half of the batter. You will have two loafs on one sheet. Lightly brush the tops of each loaf with milk. Bake these for 15 to 20min or until firm to the touch.

Remove tray from the oven and reduce oven to 300F, after a few minutes move the loaves (with the parchment paper) on to a wire rack. After 10 to 15 minutes cut the each loaf (at an angle) in to about 1/2 or 3/4 inch biscotti. Lay them cut side down on the baking sheet and bake for 10 min. Flip to the other side (top side down) and bake for another 10 min. Remove and let cool on a wire rack. Store in an air tight container after they've cooled completely.

These will keep for some time in an airtight container... I made these about a week or more ago and they're still pretty fresh tasting. They also go very well with my coffee in the morning! I hope you'll try these...they're great to make and store since it yields a decent quantity and are great on the run as well!

As always, happy baking!!! I will take some snap shots soon and post them.

Wednesday, June 24, 2009

Bhindi ki bhujya (Oakra) - Basics III

Even as a child, one of my most favorite vegetables was Bhindi (okra, lady fingers). My mom would make this really quick version with lots of sliced onion and tomato, sautéed with the bhindi and just a few spices. It was delicious and when I was old enough to cook, it was one of the things I often made.

So before I give you the recipe, let me back track and explain the title of this post. Bhindi ki Bhujya, bhindi is okra and bhujya is an Urdu term used to describe any sautéed vegetables. So be it allu (potato), baingan (eggplant), gobi (cauliflower), etc. they can all be made in to bhujya's. If you remember in one of my first posts on cooking basics I explained how sabzi's (vegetables) are made in to "bhujya" or added to meat and form "saalan" (curry's/gravy). I also explained what bhagaar is and how it works as either a base or garnish. You will need these tips make this recipe...

You will need:
1 medium onion sliced
1 tbsp zeera (cumin seeds)
2 to 3 sabuth laal mirch (dried whole red chili)
1 tsp garlic paste
1/4 to 1/2 of a lemon or lime
1 to 2 Roma tomatoes diced
salt (to taste)
1 bag frozen (cut) bhindi or about 4 cups chopped fresh bhindi

In a large skillet, prepare your bhagaar... heat some oil then add the zeera and laal mirch. Wait till the zeera starts to get some color and add in the onion. Over high heat sauté until the onion starts to get translucent. Add in the garlic paste, bhindi, salt and lemon/lime. Sauté for a few minutes until all of the ingredients are mixed well. Add in the tomatoes, stir and cover. Lower the heat to medium or medium low and let cook until the tomato starts dissolving. Turn/stir the bhindi a few times during the process to ensure even cooking. Once the tomatoes have dissolved, uncover and sauté until there is no water/liquid remaining. There should be some juice in the vegetables (onion, bhindi, etc) but the mix should be fairly dry. But be careful! Do not overcook and dry out your vegetables...


That's it! Simple and quick :) Hope you'll enjoy this bhujya as much as I do... it’s very nutritious and tastes good too. Happy cooking!!!

Monday, June 8, 2009

Chicken Bake with a Stroganoff like sauce


Not too long ago, I pinched a nerve in my neck. This was just after a very busy few weeks where I hardly had the chance to cook. We must have ate out 10 of the 15 days and here again was another reason for me not to cook! A couple days later I decided enough was enough and the groceries needed to be salvaged quickly, unfortunately not all survived this long hiatus...

I had some chicken breast sitting in the freezer and some mushrooms that were just barely surviving. I decided I needed to whip up something that involved the least amount of stirring and effort, thus was born this Chicken Bake recipe. Here is what I did:

1+ lb chicken breast (boneless)
1 small package mushrooms sliced (any kind will do fine)
1/2 can of sweet corn
crushed garlic (to taste)
salt (to taste)
Worcestershire sauce (to taste)
~ 1 cup chicken stock
~2tbsp butter
1/3 cup chopped onion (I used the frozen one, it works fine)
3 to 4tbsp sour cream
1tsp parsley flakes

In a large saute pan add the butter. Once melted add in the chopped onion. When the onion is cooking (reaching transparency) add the garlic, salt and Worcestershire sauce. Then add the mushrooms, stir and cover. Let this cook for 5 to 7 min until the mushrooms are wilted and there is very little/if any liquid remaining. Add the olive oil, corn, chicken stock, sour cream and parsley; mix well and cover. Once the liquid starts to boil, reduce heat and simmer for about 7 minutes. The contents should be a thick stew type consistency (not too dry, nor too watery), if you need you can add a little flour to thicken up your sauce.

Empty the contents into a glass or porcelain casserole dish. Use the same skillet to cook your chicken breast. Slice in half, thus reducing the thickness of a normal chicken breast piece. Salt and flour each piece, then place in heated skillet with a dash of olive oil. Cook on each side for about 5 or 6 min on medium high heat. Remove the chicken from the skillet and place in the casserole dish with the sauce. Add some more chicken stock if your sauce looks a little dry, cover the chicken with the sauce and then place in the oven (uncovered). Bake at 375 degrees for 25 to 30 minutes. Let sit for 5 min out of the oven before plating.

I served this with a Mushroom and Garlic couscous but you can serve it with plain rice, mixed vegetables, garlic bread...whatever you have available and meets your fancy! And look, I remembered to take pictures this time!!!

Hope you enjoyed this post and will try making a chicken bake of your own! Please share your recipe or alterations with me if you do. As always...Happy Cooking!

Monday, April 27, 2009

Cilantro Lime Chicken Burgers

As many of you around the DC metro area know, we just had an amazingly warm weekend. It was a sneak in to summer, which I hope is just around the corner :) With summer weather comes more outdoor activity and one great outdoor activity is of course BBQ'ing. Last night I made a spur of the moment plan to BBQ and had a couple friends over to enjoy the very pleasant evening with us. With no advance preparation and limited groceries, we did a pretty decent job. On the menu, among many things, was Cilantro Lime Chicken Burgers.

If any of you shop at Trader Joe's, you may have come across their frozen Cilantro lime chicken patty's. That is where I got the inspiration for my version of chicken burgers. Here is the recipe and below I will list out some great toppings you can add!

1lb ground chicken
2 to 3tbsp lime juice
1tsp crushed garlic or 1tbsp garlic powder
1tsp salt (or to taste)
soy sauce (you can add this instead of salt)
~ 1/2 cup chopped cilantro leaves
1tbsp parsley flakes (optional)
1tsp cumin powder (optional)

Mix all of the ingredients and keep covered in a bowl until ready to use. If longer than 30 min till cooking time, meat can be kept in the fridge until ready to use. Form in to patty's and cook on either indoor or outdoor grill about 7 to 10min on each side. Ground chicken cooks faster than beef and will dry out so be careful not to over cook.

You can add cheese to this if you like and it tastes great with a little garlic mayo or regular mayo on the bun. You can also add sliced avocado, lettuce or tomato. The topping possibilities are endless, so be creative and happy eating!

Thursday, April 23, 2009

Sloppy Joe's!!!

Hello Everyone! I know its been forever and a day since I posted anything new and I am so sorry. BUT this long hiatus was not unfounded. I've been busy with so many creative things (lots of cooking too) and haven't had a chance to write. I will diligently try to update as much as possible in the next few weeks, all while packing and moving!!! In the mean time, you can check out one thing thats been keeping me busy these past few weeks http://www.sindulgellc.com/

I'm taking a break from packing up our apartment right now and decided, since I have a quick minute, to type up a quick recipe from the other day. I honestly can not remember the last time I had a sloppy joe, maybe back in grade school? A good friend came over when I made these and she said she had only had them once in her life when she was a little girl in school. When was the last time YOU had a Sloppy Joe?

Because we are moving soon and I've been busy packing and avoiding grocery shopping, I took a short cut on dinner by whipping these up (takes all of 20 min) and using a Manwich sauce can as a base. I substituted ground turkey for the ground beef traditionally used since my husband isn't allowed to eat red meat (cholesterol). For sides, I baked some fries (pre-packaged) and made a simple mushroom and sweet corn casserole. We had a "fast-food" meal at home, with out the extra fat and unhealthy ingredients...

All you need is:
1 can (15 or 16 oz) Manwich Sauce
1 small onion
1 tsp garlic paste
2 tbsp cooking oil
~1lb ground turkey (or beef if you want)
1 tbsp Worcestershire Sauce
1 1/2 tsp apple cider vinegar (optional)

Chop (dice) the onion and saute over medium heat until it becomes translucent. Add the garlic and mix, then add your meat (rinsed and drained). Cook the meat covered, stirring occasionally, until no longer pink. Uncover and continue to cook for a few min. Add the Worcestershire Sauce and vinegar (if you want). Stir well. After a few minutes (when the liquid reduces a bit) add the Manwich sauce, stir well and cook for a few minutes until it reaches a consistency you like. That's it! Simple and quick, it shouldn't take more than 20 to 25 minutes.

Pour your mixture on to hamburger buns (you can also use regular sandwich bread, pita or hot dog rolls) and sprinkle with some shredded cheese (if you like). I used the Mexican four cheese blend and it melts right on to the mix when its hot off the stove. Enjoy... and don't worry about the mess!

Sunday, March 1, 2009

Masoor ki Daal (lentil)

One classic meal in Desi cooking is Daal Chawwal (lentils and rice). Basmati rice(or other long grain rice) and lentils are a staple for almost every meal, everything else is a plus. Usually for dinner in a desi household there will be chawwal, daal, subzi (vegetable) and salaan (meat dish). Growing up, I remember my parents always saying that anytime there wasn't daal chawwal for dinner, they didn't feel they had a complete meal.

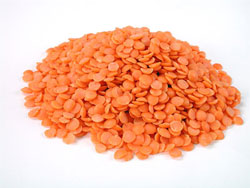
My favorite daal among the many available is Masoor ki daal. Now there are two kinds of Masoor available, red and black or green. The more common one is laal (red) daal and one of the easiest to make. People from different parts of Pakistan and India make daal in a number of different ways. The method I will share here is the traditional Dehli/UP (Utthar Pradesh) way of making lentils, by boiling it with some simple masaala's and then adding bhagaar at the end.

1 cup laal daal, picked over and rinsed
~2 cups water
1tsp salt
1/2 tsp laal mirch (red chili powder) or to taste
1/3 tsp haaldi (powder)
1/2 tsp garlic paste

In a medium heavy bottom sauce pan, add your rinsed lentils, water and all of the other ingredients. Bring to a boil and then lower stove to medium/low to low. Simmer the lentils until all the water is dry. The lentils should be soft and a pale yellow color (no whitish middles, that means they're still undercooked and will not mash. If this happens, add a little water and simmer again until there is no whitish middle). Take a large spoon and mash the lentils until they become like a thick paste...kind of like watery mashed potatoes. Then turn the stove back on to low and add water while stirring until it reaches a thick soupy consistency.

Simmer the daal until it is near boiling. DO NOT LET IT BOIL. You want to heat it to mix in the water well but do not boil, just simmer. On the side prepare a bhagaar of onions and zeera (cumin seeds). Add the bhagaar to your daal just before turning off the stove. Serve with white rice.

Monday, February 23, 2009

Sauteed Shrimp

Today I'm going to share something so simple and relatively healthy with you. This dish can be paired with or added to a number of things. You can have it on its own or add it to rice, pasta, fresh salsas, soup, salads, etc. I usually get frozen shrimp (peeled and de-veined) because I don't want to handle raw shrimp and have to de-vein it myself. I recently made this shrimp and served it with pasta and an asiago cheese sauce.

1lb frozen shrimp (thawed out per instructions on package)
1tbsp olive oil
1tbsp butter (salted or unsalted)
some chopped garlic (to taste)
salt (to taste)
crushed red pepper (to taste)
3 to 4 fresh basil leaves, chopped

In a non-stick skillet add your olive oil and butter. Heat on medium until the oil is hot but not burning (be careful because we don't want the garlic to burn). Add the garlic, red pepper and fresh basil. Keep stirring to release the aroma but do not burn your garlic. One you've heated the ingredients enough to release their flavor and aroma in to the oil, add the shrimp and lower the stove to medium-low. Add salt to taste. Let the shrimp cook on one side for about 3 min and then flip and cook on the other side for 3 to 4 min. Keep the skillet covered to allow steam. Shrimp, if over cooked, becomes very tough so be careful not to over cook. The steam will help to keep the shrimp juicy.

Once ready, you can add it to your sauce, have on its own with rice or couscous, have it on a salad or even bake it in a casserole. The options are endless but the method simple, quick and healthy because with the garlic and basil, we don't need to add too much salt. We also add in olive oil to reduce the amount of butter used for sauteing shrimp.

Good luck, be creative and eat smart!

Tuesday, January 27, 2009

Easy Guacamole

Sitting around this evening, waiting for the chicken to thaw out, I started to feel really hungry. It snowed here for the first time this winter, hence I felt like having something warm and yummy... Nachos, cream cheese puffs, crab rangoon, hot and sour soup...you get the idea! Anyway, long story short there was nothing in the fridge or pantry to fill any of the above cravings. What I did have was a bag of corn chips, avocados and tomatoes. Perfect!

Depending on who you talk to, people have a variety of beliefs what guacamole should and shouldn't have, develop your own recipe. You're going to eat it so enjoy it how you like it... just follow these basics.

Avocado mashed or crushed
Tomato, diced small (optional)
Onion, diced small (optional)
Lime juice (fresh or bottle)
Garlic Salt (you can also use garlic powder + salt separately)
Sour Cream (if your avocado isn't completely ripe)

Simply crush or mash the avocado, add the garlic, lime juice, and sour cream if needed. Mix well then gently fold in the onions and tomato. Serve immediately with chips or bread, otherwise refrigerate until ready to eat. I used sour cream to help with the consistency since the avocado I had wasn't quite ripe. Also, I don't like onion so I don't add it. Some people feel that guacamole should be only the avocado itself, nothing else. In that case just add the lime juice and salt... you can also use garlic but thats up to you.

Hope you enjoy this healthy snack as much as I did!

Friday, January 23, 2009

Almond Pesto

I love pasta, especially those with a lot of sauce. I'm a big fan of Pesto, given that basil is one of my favorite ingredients! Last night I was wanting to use up a lot of basil which had been sitting in the fridge for some time. I didn't have any pine nuts at home and needed to make dinner quickly. I decided to improvise by using almonds instead. It worked well and turned out pretty delicious too. Of course the purpose of substitution is always to use what we have in the pantry, but be careful to use blanched or regular almonds with the skin removed and try to avoid salted almonds so that you can salt your sauce or pasta to taste. (If you have plain almonds at home with skin, you can soak them in hot water for 10 min and then easily remove the skin)


1/2 bunch fresh basil, stems trimmed
~ 5 to 10 sprigs cilantro (optional)
~ 12 to 15 almonds
~ 1 tbsp crushed garlic or paste
salt to taste
2 tbsp olive oil
1/2 cup grated cheese


To make the pesto, just rinse the basil and place in a blender or food processor. Add the almonds, garlic, salt and fresh cilantro or parsley (if you want). I used a little cilantro just to add some flavor but this is up to your taste if you want to add anything in with your basil. Add in a few drops of water and puree. When the almonds seem to be almost dissolved, add in olive oil and continue to puree for a minute. Your mixture should look smooth and creamy, not too dry or lumpy. You can add water or olive oil as necessary to reach a good consistency.

Traditionally, pesto has Parmesan cheese added to it. I made this pesto and added it to a cream sauce which had Asiago cheese, so I didn't add any cheese when making the pesto itself. If you are going to have pesto on its own then please add Parmesan, Romano or any other cheese you want before the olive oil step in this mix.

Thursday, January 15, 2009

Chicken Roast

The other day my "sister-in-law to be" (that's a mouth full!) e-mailed asking me for a simple recipe using chicken breast and Desi (Indian/Pakistani) flavors. Immediately, my chicken roast recipe came to mind. I think this is a great recipe to have on hand for a number of reasons:
1. It is very easy and quick to make
2. It has a lot of flavor and can be used with both bone-in and boneless chicken
3. It can be had as a main dish or great side dish, plus the left overs can be used to make great Desi style sandwiches (Kati-roll ring a bell)
4. This is a great item for anyone trying to lose a few pounds, its healthy and naturally low fat!
5. You can alternate/substitute certain ingredients to create a completely different dish each time you make it

I'll list out the recipe first and then later show you how and what can be substituted. Feel free to e-mail me or comment if you have any suggestions/variations you've tried.

1 lb boneless chicken
2 heaping tbsp yogurt
1 full tsp garlic paste
1 tsp red chili pepper (lal mirch powder)
1 tsp ground cumin
salt to taste
~1 tbsp oil

Making sure the chicken is not frozen, dice into ~2" cubes, rinse and place in a bowl that has a lid. Add all of the ingredients except oil. Mix well, cover and refrigerate for at least 2 hours. I would recommend 4hrs to really make the chicken flavorful and moist. Remove the chicken from the fridge about 30 min before preparing (bringing it to room temp). In a deep skillet, add your oil and warm on medium heat. Add the chicken, stir and cover. Let it cook until the juice/water is almost dry, stirring occasionally to ensure all pieces are getting evenly browned. And thats it, ready to eat. Please make sure not to over-cook the chicken or it will get too dry.

Alterations-

*For bone-in chicken, use about 1.5lbs chicken to the above ingredients
*You can substitute the yogurt with 1/4 to 1/3 cup of lemon juice (this will make it more like chicken tikka)
*You can use ground black pepper instead of red chili, add some ground coriander here when using black pepper
*You can make this on a grill instead of a skillet in the summer, just put pieces on skewers and cook till tender
*You can add semi-cooked potatoes (potatoes can be cut in 1/2 or 1/4, depending on size, deep fried, salted then added to the cooking chicken)

Wednesday, January 14, 2009

Easy Ragu Sauce

As promised, I’m going to share the first recipe I tried from Restaurant Favorites. The actual recipe (Lamb Ragu) called for bone-in lamb, which we neither had at home nor desired to eat the night I made this meal. Instead, I used ground beef (chuck 85% lean) and substituted a few other spices and ingredients along the way. First I’ll share what I made and how, then at the end I will list out the recipe as it is in the book. Remember to serve this with a larger/thicker pasta like spaghetti, penne or rigatoni since it will be a very thick/heavy sauce.

2-3 carrots, cleaned and diced small
2-3 celery ribs, diced small
1 small onion, diced small
8-10 white or baby bella mushrooms, diced (optional)
~2 tbsp olive oil
~1 tbsp salt
~1 tbsp fresh crushed or bottled garlic
~1 lb ground beef (use 85% to 90% lean since you will not be able to drain)
2 tbsp tomato paste
~ 28 oz crushed or diced tomato (canned with no other ingredients)
½ tsp parsley flakes
Few sprigs fresh basil chopped or ~1 tbsp dried basil
Crushed Red Pepper to taste (optional)
~ ½ cup dry red wine (or whatever you may be drinking… I used a Shiraz blend I had open)
½ tsp sugar (optional)
Grated pecorino or parmesan cheese

In a medium to large, heavy bottom pan, warm the olive oil on medium heat. Add the carrots, celery and onions. Sautee for 5 to 7 minutes or until the ingredients start to brown just slightly. Add the mushrooms, if you like, at this point. Continue to cook for another 2 minutes then add the garlic and salt. Mix for a minute or so then add your ground beef which should have been rinsed and drained.

Cover and cook for about 10 minutes, stirring as necessary to avoid sticking. If the beef is too dry, you can add up to a ½ cup of water. Add the tomato paste and mix in well, then add the crushed tomato, parsley, red pepper and basil (if using dried basil) to the mix and cook to a boil (uncovered). Stir in the wine and simmer, stirring to reduce and scraping the bottom to pick up all the ingredients. Cook for about 2 to 3 minutes until the mix looks glossy or like a glaze. Cover and lower the heat, simmer for 30 to 40 minutes adding the fresh basil about half way through. Stir as needed during this time (every 10 min or so) and a few minutes before turning off the heat, you can add ½ tsp of sugar to offset the tartness of the sauce.

Note that alcohol evaporates from the wine when reducing, but if you still feel uncomfortable, you can use diluted grape or fruit vinegar (2/3 vinegar, 1/3 water ratio). Also, if the sauce seems too thick, add some water to deliver the perfect consistency for you (to your liking). Serve over pasta and sprinkle with grated cheese and some fresh basil if available.

What I substituted: beef in place of 1 ½ lbs lamb shoulder chop, red pepper instead of black pepper and spaghetti instead of orecchiette pasta. If you want to know how the bone-in meat was cooked into the dish, e-mail me and I will send you details.