Showing posts with label Desi Recipe. Show all posts

Tuesday, February 2, 2010

Tips & Tricks

I think at some point I was going to do a series of "quick tips" but didn't really get around to it. In between longer posts, recipes and articles, I will be adding in some Tips and Tricks you may find useful in the kitchen... or otherwise.

My first tip/trick is a HUGE time and energy saver! If you go back to my recipe for Masoor Ki Daal, you'll remember I said to mash the cooked daal until it forms a paste... well if you happen to have a hand blender/kitchen stick (here is what I have) USE IT. No more spending your time or effort (mashing can be pretty tiring) hand pureeing your lentils!

Sunday, January 31, 2010

Cooking Delima's

Today I decided to try something I've seen before but never really made myself. You may remember (if you've read previous posts) that I explained some basics on "Desi" cooking. I mentioned that the curries or gravies with meat and vegetables are called "Saalan". Well today I made "saalan" without the meat.

There are some basic ingredients you use to make the gravy for meat curries... I made the same gravy but added only the vegetables...not the meat. I used turnips this time but you can do this with most any vegetable available. Here is what you do:

1 large turnip, peeled and diced (medium dice)
1 medium onion sliced thin
few whole black pepper corns
2 to 3 whole cloves
Very small piece of cinnamon stick
Red or Cayenne pepper (powder) to taste
1/4 tsp Haldi (turmeric powder)
1 tsp ground zeera (cumin)
1 tsp ground dhaniya (coriander seed)
1 tsp crushed garlic or garlic paste
1.5 cups water
2 to 3 tbsp tomato puree or crushed tomato
salt to taste

In a medium (heavy bottom) pot, saute onion in some oil until light brown. Add black pepper, cloves and cinnamon stick. Saute for a few seconds then add the red pepper, zeera, dhaniya and garlic. Mix well and then add the turnip and water. Cover and let cook on medium low heat. Stir a few times in between. When turnips are almost soft, add the tomato and mix well. the water will have reduced a little and the gravy will start to thicken slightly. Let cook until the turnip is completely cooked (soft). You can garnish with some chopped cilantro if you like. Serve with white rice or naan.

Wednesday, June 24, 2009

Bhindi ki bhujya (Oakra) - Basics III

Even as a child, one of my most favorite vegetables was Bhindi (okra, lady fingers). My mom would make this really quick version with lots of sliced onion and tomato, sautéed with the bhindi and just a few spices. It was delicious and when I was old enough to cook, it was one of the things I often made.

So before I give you the recipe, let me back track and explain the title of this post. Bhindi ki Bhujya, bhindi is okra and bhujya is an Urdu term used to describe any sautéed vegetables. So be it allu (potato), baingan (eggplant), gobi (cauliflower), etc. they can all be made in to bhujya's. If you remember in one of my first posts on cooking basics I explained how sabzi's (vegetables) are made in to "bhujya" or added to meat and form "saalan" (curry's/gravy). I also explained what bhagaar is and how it works as either a base or garnish. You will need these tips make this recipe...

You will need:
1 medium onion sliced
1 tbsp zeera (cumin seeds)
2 to 3 sabuth laal mirch (dried whole red chili)
1 tsp garlic paste
1/4 to 1/2 of a lemon or lime
1 to 2 Roma tomatoes diced
salt (to taste)
1 bag frozen (cut) bhindi or about 4 cups chopped fresh bhindi

In a large skillet, prepare your bhagaar... heat some oil then add the zeera and laal mirch. Wait till the zeera starts to get some color and add in the onion. Over high heat sauté until the onion starts to get translucent. Add in the garlic paste, bhindi, salt and lemon/lime. Sauté for a few minutes until all of the ingredients are mixed well. Add in the tomatoes, stir and cover. Lower the heat to medium or medium low and let cook until the tomato starts dissolving. Turn/stir the bhindi a few times during the process to ensure even cooking. Once the tomatoes have dissolved, uncover and sauté until there is no water/liquid remaining. There should be some juice in the vegetables (onion, bhindi, etc) but the mix should be fairly dry. But be careful! Do not overcook and dry out your vegetables...


That's it! Simple and quick :) Hope you'll enjoy this bhujya as much as I do... it’s very nutritious and tastes good too. Happy cooking!!!

Sunday, March 1, 2009

Masoor ki Daal (lentil)

One classic meal in Desi cooking is Daal Chawwal (lentils and rice). Basmati rice(or other long grain rice) and lentils are a staple for almost every meal, everything else is a plus. Usually for dinner in a desi household there will be chawwal, daal, subzi (vegetable) and salaan (meat dish). Growing up, I remember my parents always saying that anytime there wasn't daal chawwal for dinner, they didn't feel they had a complete meal.

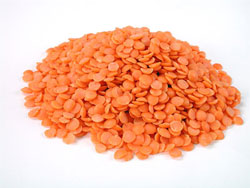
My favorite daal among the many available is Masoor ki daal. Now there are two kinds of Masoor available, red and black or green. The more common one is laal (red) daal and one of the easiest to make. People from different parts of Pakistan and India make daal in a number of different ways. The method I will share here is the traditional Dehli/UP (Utthar Pradesh) way of making lentils, by boiling it with some simple masaala's and then adding bhagaar at the end.

1 cup laal daal, picked over and rinsed
~2 cups water
1tsp salt
1/2 tsp laal mirch (red chili powder) or to taste
1/3 tsp haaldi (powder)
1/2 tsp garlic paste

In a medium heavy bottom sauce pan, add your rinsed lentils, water and all of the other ingredients. Bring to a boil and then lower stove to medium/low to low. Simmer the lentils until all the water is dry. The lentils should be soft and a pale yellow color (no whitish middles, that means they're still undercooked and will not mash. If this happens, add a little water and simmer again until there is no whitish middle). Take a large spoon and mash the lentils until they become like a thick paste...kind of like watery mashed potatoes. Then turn the stove back on to low and add water while stirring until it reaches a thick soupy consistency.

Simmer the daal until it is near boiling. DO NOT LET IT BOIL. You want to heat it to mix in the water well but do not boil, just simmer. On the side prepare a bhagaar of onions and zeera (cumin seeds). Add the bhagaar to your daal just before turning off the stove. Serve with white rice.

Monday, February 23, 2009

Basic Masaala's

Think of this as something similar to Emeril's famous Essence or the famous Louisiana BBQ spice rubs. Only difference, the concoctions I'm going to share date back to the Mughal period, when dishes created for royalty became popular and eventually common among the Muslim households. Some of these masaala (spice) mixes are also a melding of the Muslim and Hindu cultures, which coincided in the Sub-continent (what is now South Asia). Certain spices are common in the Hindu way of cooking and some (mostly those for meat dishes) are particular to the Muslim style of cooking and an influence from the Persians and Turks.

I will share with you some common masaala's which you can use to create a number of different Desi dishes. Remember from my last post on basics, I explained the concept of bhagaar...well these spices are usually added to warm oil at the start of cooking, thus creating the base.

"Phorran" is an old term used to describe a certain spice mix, but the literal translation of the word is prescription or recipe (as relating to medicine). "Panch (#5) Phorran" is a spice mix of five spices, often used for certain types of vegetables and chicken, but can be adapted for cooking some meat curry's as well. The more common term for Panch Phorran is Achar ka Masaala (pickling spices); most Desi people today would know the term Achaar (pickle) since they use the condiment regularly with meals, eg. Aamn ka Achaar (mango pickle), Nimbo ka Achaar (lemon/lime pickle), etc. The five spices required for achaar ka masaala are:

Zeera (cumin seed) (do not confuse with caraway)
Sonph (fennel seed)
Kalonji (Nigella seed) (do not confuse with onion seed or black sesame)
Rai (Brown Mustard seed)
Mehthi Dana (Fenugreek)

When cooking with these spices, you would traditionally use equal parts of each spice. I often use more zeera and avoid the use of mehthi because of its bitter taste and side affects (you can smell it in your sweat and urine for a few days after). Also note, many of the spices (depending on the dish) are used either whole or ground. This particular spice mix is never used ground...always whole.

Garam Masaala is a very common spice mix in Desi cooking. Today you will find it available in some larger grocery stores in a ground form, not just in Indian stores. This mix can be used whole or ground and often times is also used as a garnish, not just a base. The word "Garam" means "hot" and this relates directly to the nature of the spices in this mix. All of the spices in this mix are by nature hot.
In traditional Desi cooking, there is a belief that all ingredients (fruits, vegetables, herbs, spices, meats, etc.) have a certain "taseer" (genetic makeup or nature) to them. Some things are hot by nature, some are cold, some are soothing while others are acidic or indigestion inducing. There is a whole science and logic behind Desi cooking and a lot of it has to do with the nature of ingredients, thus what should be mixed with what and what should never be mixed with something, etc. The concepts are similar to the western logic of some vegetables being meant for summer consumption while others are meant for winter...it is based on their nature or the effect they have on our body once consumed. The spices required for garam masaala are:

Zeera
Kali/Gol Mirch (whole black pepper)
Long (whole cloves)
Sabuth Dhaniya (corriander seed)
Barri Ilaychi (large black cardamom)
Daal Cheeni (cinnamon stick)

For every day cooking I will use this mix whole but without barri ilaychi and sometimes without the cinnamon (depending on what I'm making and the time of year). Many times I'll use it ground as a garnish, but again without the barri ilaychi since it has a very strong taste. In some dishes you can substitute the barri ilaychi for choti ilaychi which is green cardamom, for example when making pulao. Some people also like to add bay leaf into this mix which is nice for some rice dishes and curry's but not traditional in the garaam masaala you can pre-mix and keep for regular use.

Gosht ka Masaala, "Gosht" refers to red meats like beef, lamb and goat. This masaala is used to make traditional Muslim meat curry's (gosht ka salaan). Murghi (chicken) and Machli (fish) salaan's get different spices, so be careful as not to use this for white meats...the spices will be over powering. Salaan is usually made with onion and garlic, gosht ka salaan also gets ginger and either tomato or yogurt; plus the spices I'm about to list out. Gosht ka Masaala is:

Haldi (ground tumeric)
Laal Mirch (cayenne or red chili powder)
Salt
Kali/Gol Mirch
Long
Pissa Dhaniya (ground or powder corriander seed)
Pissa Zeera (ground or powder cumin seed)
(some people like to add cinnamon but its not traditional)

Well I will leave you with these basic masaalas for now and write up some more traditional concoctions for you later. As always, if you have any questions/concerns don't hesitate to reach out.
Good luck and be creative!

Friday, February 13, 2009

Basics II - Bhagaar

So the second thing I'd like to discuss as regards basics is "bhagaar". Most desi cooks know "bhagaar" to be the garnish for lentils and some curry's. The truth is bhagaar can be either the BASE or GARNISH for a number of different dishes. Any time you heat oil with various spices, herbs and/or onion it is called bhagaar.

The purpose behind bhagaar is to add flavor and also aroma to your dish. When cooking desi vegetables, one often uses different spices to prepare the bhagaar before adding the main vegetable. Most lentils get fried onion, red chili and/or cumin seeds as the garnish just before serving. Most spices release their flavor and aroma once they are heated, hence the heating in oil of spices to enhance a dishes flavor. One thing to note, often times people tend to over cook desi food because they feel they need to really heat/saute (bhuno) the sauce or spices. This merely burns or overcooks the sauce or food and doesn't enhance or add to the flavor. Here in lies the importance of using bhagaar as a base to your cooking. By doing this you avoid overcooking the rest of your ingredients, keeping them fresh and flavorful.

Finally I get around to taking a picture! Hope this helps...


Tuesday, February 10, 2009

Covering some basics

I was going to post the recipe for one of my favorite vegetables today, but as I sliced onions, I thought about when I first started cooking. You see, my father taught my mother how to cook after they got married. She was after-all only 16 years old and my father, an extremely picky eater. Growing up, he used to spend a lot of time with his Nani (maternal grandmother) and would see how his sisters were being "trained" to be good girls/wives. He of course learned the traditional methods to everything! Cooking, sewing, putting on henna, embroidery... you name it, he could do it (or figure it out pretty quick). So when my dad and his brothers landed up in this country with no sisters, mother, Nani or maids to cook for them; my dad took on that responsibility. If he could do it for so many years, how could his wife not jump right in! Thats how the daily kitchen battle in our house began... little did anyone know, it would never end!

Over time, and in our (the kids) humble opinion, my mother became the better cook. My father started to reserve his cooking to only delicacies and special events or parties...my mom did the every day cooking. When we moved to Pakistan, things changed a little. There was no need for either parent to cook, but they did have to train all the khansama's (cook's) that ever worked for us. No one could ever please my father, there was always something missing or overdone. When I started cooking, rather started dabbling in the kitchen now and then, it was always a nightmare.

If ever my father saw me in the kitchen, he would observe and then discipline. In his mind, EVERYTHING I did was wrong because it was not the way his grandmother or mother had done it. It wasn't the way he would've done it. There was always a battle and God forbid if I ever made something the way my mom taught me as opposed to his way. For the longest time, I stopped going in to the kitchen any time my father was around. But many years later, I realized how much I had learned through all that tension. In the following few posts, with a lot less stress and fuss, I will share with you some basics that will guide you through any type of cooking and help in honing your culinary skills.

First lesson: ONION BASICS

I'll spare you how I came to learn this fact but there is a "proper" way to slice onions. Most desi cooking, vegetables or meat curry's, require sliced onion. Rarely do you use chopped or diced onion in cooking. After peeling the onion and cutting it in half, its important to remover the "eye", which is the circle at the bottom of the onion where all the layers come together. Also, you slice the bulb in half through the top and bottom; not through the center (wide part) of the onion. Once you've removed the eye, slice across the onion to form semi-circle slices (see photo). Do NOT cut along the onion, meaning cutting the onion length-wise getting thick slices.

I don't know if its true or not, but my father would say that the onion doesn't dissolve nor brown properly if it isn't sliced right. He also insisted that if it didn't dissolve, the taste was different. This second tid-bit I have to agree with. Many times I've tasted vegetables or curry's prepared the way I would make them but the only difference is the onion... it really does taste different if it doesn't dissolve properly.

Tuesday, February 3, 2009

Easy Haleem

Not too long ago in one of my blogs, I mentioned making Haleem over inauguration weekend. A friend later asked me for my recipe/method and since I was writing it out for her, I figured I'd share with all of you as well! To make life simpler (and not have to buy 10 different types of grains) I buy the Shan Haleem mix, available at most Indian/Pakistani grocers. Make sure you buy the regular or Shahi Haleem Mix and not the Easy Haleem Mix (unless you prefer to have very slimy consistency). Also, the National Brand isn't so tasty... they don't have the right spices nor the right grains. In addition to the pulses in the box, I add a few grains which we usually have at home. It is up to you if you want to add all or some of these to your Haleem.

1 box Shan Haleem mix (packet of grains etc soaked for 1 hour)
1/2 cup channa daal (soaked for at least 2 hours)
1/2 cup brown basmati or long grain rice (soaked for 30 min to 1 hour)
1/4 cup oats (normal - not quick cook) or barley
1/4 Bulgar or cracked wheat (optional)
1lb beef (shank, without bone)
1lb beef with bone
ginger paste (about 1tbsp)
garlic paste (about 1.5 tbsp)
salt

Make sure you soak everything that needs to be soaked well in advance so when it comes time to make your Haleem, all you do is add everything step by step. Heat some oil in a large stock pot or big dutch oven and add the washed meat, ginger and garlic paste. Saute until the meat is no longer bright red, then add 1/2 to 3/4 packet of the spice mix (depending on how spicy you want it)... I never add the whole packet because it's just too much. If you want, you can also add even less of the spice packet but put some fresh garam masala and cayenne pepper (laal mirch) on your own to add spice/flavor. Mix and saute for a few minutes on medium heat.

Now add all of your grains/pulses, 1tbsp salt and about 8 to 10 cups of water (do not use the water in which your grains were soaking). Stir, cover and turn heat up to high. Check occasionally and when the water/haleem starts to boil, turn the heat down to medium or medium high...depending on electric or gas respectively. Let the mix cook for a few hours, stirring on and off (maybe every 30 to 40 min). As the haleem is cooking, you will see the meat starting to fall off the bone (maybe after 2.5 to 3 hours). At that point turn your heat down to medium low or low. After another hour or so, you can turn off the heat and remove (pull out) all the pieces that have/had bone (making sure to remove all bone from the pot). You want to pull the meat off the bone and keep aside. You can also take out some more of the bone-less meat if you want your haleem more chunky (that's how I like it).

Then take a hand blender or a large masher and grind/mash the haleem. You want it to be a thick soupy consistency but not too watery. If it is too thick, you can add more water or if it is too watery, put it back on the heat to thicken. Add the rest of the meat back to your haleem and mix well. Break down any large pieces of meat with your spoon, turn the heat back on to medium and cook while on the side you brown some onion (one small to medium onion sliced fine) in about 3/4 cup of oil. You will want to add the browned onion with oil to the haleem as bhagaar/thurka. Before adding the onion, taste to make sure you have enough salt.

When browning the onion, you can cut and brown some extra to keep on the side as one of the garnishes. Additional garnishes, which are kept to the side, are chopped cilantro; finely chopped green chillies; fine sliced (julienned) ginger; lemon or lime and chaat masala.

Monday, February 2, 2009

Thought on Desi Food

It occurred to me this past week that more oft than not, I have friends and family asking me for Desi Recipes. The intention of this blog was originally to share all things -food related, as they occur in my life. However, with this growing interest in traditional Indian and Pakistani foods, I've decided to share some of my family secrets. I will continue to post other things, as I normally do, but will create a new label for Desi Recipe. I figure this will be easier than creating a separate blog for just Desi recipes and keep all recipes accessible from one spot.

Feel free to send me your suggestions and/or feedback about this topic. Any requests for specific items/recipes or share with me pictures of foods you prepared using my recipes! I hope to get a little better about providing you with pictures, so any help in that regard would be appreciated.

Thursday, January 15, 2009

Chicken Roast

The other day my "sister-in-law to be" (that's a mouth full!) e-mailed asking me for a simple recipe using chicken breast and Desi (Indian/Pakistani) flavors. Immediately, my chicken roast recipe came to mind. I think this is a great recipe to have on hand for a number of reasons:
1. It is very easy and quick to make
2. It has a lot of flavor and can be used with both bone-in and boneless chicken
3. It can be had as a main dish or great side dish, plus the left overs can be used to make great Desi style sandwiches (Kati-roll ring a bell)
4. This is a great item for anyone trying to lose a few pounds, its healthy and naturally low fat!
5. You can alternate/substitute certain ingredients to create a completely different dish each time you make it

I'll list out the recipe first and then later show you how and what can be substituted. Feel free to e-mail me or comment if you have any suggestions/variations you've tried.

1 lb boneless chicken
2 heaping tbsp yogurt
1 full tsp garlic paste
1 tsp red chili pepper (lal mirch powder)
1 tsp ground cumin
salt to taste
~1 tbsp oil

Making sure the chicken is not frozen, dice into ~2" cubes, rinse and place in a bowl that has a lid. Add all of the ingredients except oil. Mix well, cover and refrigerate for at least 2 hours. I would recommend 4hrs to really make the chicken flavorful and moist. Remove the chicken from the fridge about 30 min before preparing (bringing it to room temp). In a deep skillet, add your oil and warm on medium heat. Add the chicken, stir and cover. Let it cook until the juice/water is almost dry, stirring occasionally to ensure all pieces are getting evenly browned. And thats it, ready to eat. Please make sure not to over-cook the chicken or it will get too dry.

Alterations-

*For bone-in chicken, use about 1.5lbs chicken to the above ingredients
*You can substitute the yogurt with 1/4 to 1/3 cup of lemon juice (this will make it more like chicken tikka)
*You can use ground black pepper instead of red chili, add some ground coriander here when using black pepper
*You can make this on a grill instead of a skillet in the summer, just put pieces on skewers and cook till tender
*You can add semi-cooked potatoes (potatoes can be cut in 1/2 or 1/4, depending on size, deep fried, salted then added to the cooking chicken)

Wednesday, October 29, 2008

Something a little different - Pumpkin Sabzi

Back in the early 90's I was fortunate enough to live overseas. In Karachi (Pakistan), people visit weekly outdoor bazaars where they can purchase fresh produce directly from farmers or their representative. In a sense this is an old school version of a farmers market, usually being the only place one can purchase fruits and vegetables. Grocery stores and delis are few and far between.

Thanks to the nature of this system, I was exposed to eating fresh vegetables and fruits IN SEASON! No flash frozen, cold storage or manufactured fruits and veggies. This in turn exposed me to some foods I had never thought of trying or even ever seen before. This brings me to a recipe you pumpkin lovers might enjoy!

Pumpkin Curry (vegetarian)

1/4 of a medium/large sized pumpkin- peeled, cleaned and diced into 1" pieces
2-3 tbspns cooking oil
1 medium sized onion, sliced
1 tspn cumin seeds
1/2 a cinnamon stick
1 tbspn salt
1 tspn crushed red pepper
1/2 tspn crushed garlic (optional)
1 Roma tomato diced (optional)

1/4 cup water

In a large skillet add cooking oil (what ever you use regularly). When warm but not hot add the cumin, crushed red pepper and cinnamon. Let the cumin brown slightly (do not burn). Add the onion and stir. Let onion cook till they wilt or start to become translucent...do not brown. Add the pumpkin, garlic and salt. Stir well and add some water, just enough to steam, then cover. Let cook for about 10min stirring a few times in between.

After 10-12 minutes, add the diced tomatoes and re-cover. Cook the curry, stirring occasionally, until the pumpkin is soft and somewhat translucent. Tomato should be completely dissolved and pumpkin so soft that it melts in your mouth (it should not be chewy but soft enough to mush with your tongue).

Its simple, quick and delicious! The optional ingredients make this more of a curry, but you can keep it simple and more fresh tasting without the garlic and tomato. I hope you enjoy it.